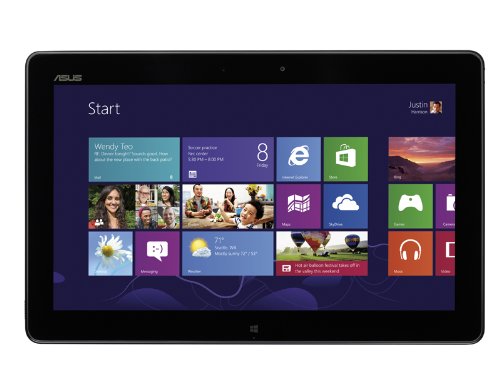
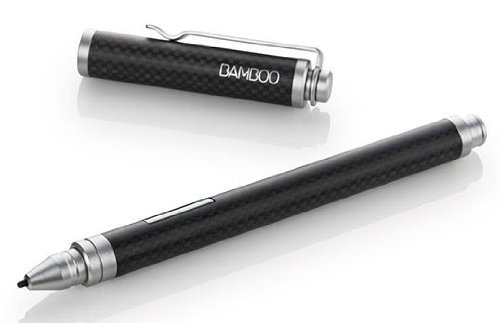
My excitement in discovering that Asus' VivoTab Note 8 pen driver contained a much higher resolution calibration tool quickly turned to panic when I discovered that the driver could render pens on other devices useless.

As I was testing the Asus VivoTab TF810C for the review I published yesterday, I installed the AVTN8 Wacom driver instead of the standard version. I was unaware at the time that that file contains a firmware update intended only for the 8-inch tablet. Installing the driver on either the TF810C or Dell's Latitude 10 changes the pen sensor, making it impossible to calibrate. And the change cannot be undone without another firmware update (not yet available).

Several of you have reported successfully running the AVTN8 driver on other hardware, including the Surface Pro 1 and 2, but I strongly advise you to resist that temptation. It's simply not worth the risk of ruining your hardware.

But what to do if the 25-point calibration found in Wacom's 7.2.0-10 Enhanced Tablet PC driver isn't enough?

Fortunately for you, I've been given a workaround that should work for all devices and is reversible in the event you don't like the results.

CAUTION: THIS FIX IS FOR TECHNICALLY ADVANCED USERS. PLEASE DON'T ATTEMPT IF YOU'RE NOT FAMILIAR WITH THE WINDOWS OPERATING SYSTEM. PROCEED AT YOUR OWN RISK!

Copy the attached code into a file named ISDTabletDefaults.xml. This is the grid layout for the AVTN8.

<?xml version="1.0" encoding="UTF-8"?>
<root>
<MultiCalRows>0,5,10,15,50,90,95,100</MultiCalRows>
<MultiCalCols>0,5,40,45,50,55,60,95,100</MultiCalCols>
</root>

It will cause issues if you don't reproduce this code exactly as seen above. You have been warned!

 Move the ISDTabletDefaults.xml file you just created into the C:\Windows\System32 folder.

Next, clear your Wacom preferences. Go to Control Panel\Programs\Programs and Features.

Select  Wacom Pen from the list of programs, then click on Change.

Click the Remove button under My Preferences.

Now, the next time you calibrate you should get the 81-points.

If for some reason you are dissatisfied with the results and would like to revert to 25-points, delete the ISDTabletDefaults.xml file from your System32 folder and clear your Wacom preferences again.

The next time you run the advanced edge calibration tool, it will have 25-points.

Posted
AuthorRick Rodriguez
CategoriesTips
8 CommentsPost a comment

It began, as these things often do, innocently enough.

Perusing the TabletPCReviews forums, I spotted a post that said the Lenovo Thinkpad 10 tablet was finally available for sale in the U.S.

When that Wacom-equipped tablet was first announced, it was expected to be priced around $600, so I followed the link to see where the final price had ended up. I was shocked to see that Lenovo had settled on $729 for the Atom-powered, 10.1-inch, 2GB RAM, 64GB storage device. Even with a 1920x1200 display, that price seems totally unrealistic.

I tweeted as much and someone on my feed inquired about the Atom processor.

I had ignored all Atom-based devices when Windows 8 tablets first began appearing. Their reputation as slow, netbook class processors convinced me to look elsewhere back around the time the Surface Pro 1 was first released.

But the question gnawed at me: is an Atom-powered device with only 2GB of RAM sufficient to run a graphics application without unacceptable lag?

I began googling around for reviews of prior Atom tablets when Google or Amazon, in their algorithmic wisdom, served up an ad for the Asus VivoTab TF810C for only $299. When it was first released in late 2012, the 810C listed for just under $800.

And the specs compared very favorably with the Thinkpad 10: 11.6-inch screen, 1366x768, 2GB RAM, 64GB storage, Wacom digitizer, Atom processor. Yes, this Atom is a dual-core Z2760 running at 1.8 GHz vs. the Thinkpad 10's Z3795 quad-core, but we're talking a $500 difference here!

My curiosity was piqued, but I was able to resist the temptation and went about my business. Later that day or the following, Asus released its new Wacom drivers for the VivoTab Note 8.

I'm no fan of 8-inch Windows 8 tablets because running desktop applications on such small screens can be an eye-straining exercise in frustration. The AVTN8 was also hurt by a very poorly calibrated digitizer, with very inaccurate corners and other dead spots.

But once I ran the new 81-point calibration found in that driver, my opinion of the device significantly improved. Yes, you'll still go blind trying to run crowded desktop UIs, but with cleaner designed apps like Sketchbook Pro, the AVTN8 is now a lot of fun to use.

Another Twitter follower wondered whether the new drivers would work on the old TF810C and I was  a goner. Now I simply had to purchase one of these bargains to find out for myself.

The Asus VivoTab TF810C packaging is very professional: nothing bargain basement or closeout about it.

The Asus VivoTab TF810C packaging is very professional: nothing bargain basement or closeout about it.

The 810C arrived last weekend and quickly consumed a large portion of the time I wasn't supposed to be spending on tech.

Beneath the tablet is more elegant, well-designed packaging.

Beneath the tablet is more elegant, well-designed packaging.

Unboxing the device was one of the most pleasant experiences I've had recently (and you know I've unboxed a lot of gear). Spare nibs?  Cleaning cloth? How thoughtful.

The Asus VivoTab TF810C pen is about the size of the Fujitsu T5000. It comes with five spare nibs and an extractor. There is also a cleaning cloth. The USB dock/power connector on the tablet is non-standard so it requires a USB dongle to connect per…

The Asus VivoTab TF810C pen is about the size of the Fujitsu T5000. It comes with five spare nibs and an extractor. There is also a cleaning cloth. The USB dock/power connector on the tablet is non-standard so it requires a USB dongle to connect peripherals.

The tablet even ships with a very nice faux leather sleeve that can be configured as a stand! I was convinced that I'd uncovered the biggest bargain ever.

The sleeve will definitely keep your tablet out of harm's way. It includes a pen holder too.

The sleeve will definitely keep your tablet out of harm's way. It includes a pen holder too.

The tablet is slightly thinner and lighter than the Surface Pro 3 and almost half the thickness of the Surface Pro 2.

The tablet has two openings along the bottom edge for the discontinued dockable keyboard. The rightmost slot is the USB connector which requires a non-standard multi-pin connector similar to those on older iPhones. To attach peripherals, a USB adapter dongle is included.

The back of the tablet has a nice brushed finish that is only marred by the unsightly stickers manufacturers insist on placing on their devices.

The back of the tablet has a nice brushed finish that is only marred by the unsightly stickers manufacturers insist on placing on their devices.

The TF810C ships with Windows 8, so I knew I was in for a long stretch of updates before I could test the tablet. But I never imagined it would take as long as it did. This process is so painful, in fact, that it's almost enough to recommend that you forget about this or any other older device. My Twitter followers read every sordid, excruciating detail in real time as I haltingly brought the TF810C up to date.

Windows lies when it tells you the updates it needs to install.

Windows lies when it tells you the updates it needs to install.

There were at least 150 updates to install before I could think of updating to Windows 8.1. By default the operating system will download and install these updates in the background, but that process could take days and severely cripple performance.  Instead, I forced the tablet to download and install the updates, which took more than 12 hours.

I then tried to install Windows 8.1 but I kept getting a message that the tablet was incompatible with that software. I found a driver package on the Asus site which apparently solved the compatibility issue and I then installed Windows 8.1. After that, of course, there were dozens more 8.1 updates to install before the tablet was fully up to speed.

All told, this rabbit hole had already taken 24 hours to traverse and I still didn't know whether the tablet was adequate for sketching.

Then I committed a fatal (no exaggeration) mistake: I installed and ran the AVTN8 pen drivers and proceeded to kill my pen sensor. No matter what I tried, I could not get the digitizer to register within five inches of the pen.  Desperate, I even refreshed the tablet all the way back to Windows 8, undoing a full day's work.  No difference. The pen was unusable.

Fortunately, I bought my tablet from Amazon, so getting a replacement for a defective device is as easy as pie. (I didn't know at the time that the driver installation was the culprit. I just assumed the digitizer was bad out of the box. Should I feel guilty?)

The replacement arrived Tuesday and I started the update process again. Still slow, but amazing how much faster things can go once you know the missteps to avoid.

I turned off automatic Windows updates immediately. No sense tying up the wifi.

Next, I patched the tablet's BIOS with the Asus Live Updater.

Then I ran Windows Update from the desktop control panel.

At least 50% of the updates are security fixes, so I decided to do the installation manually, deselecting all the security related items. I know this sounds crazy but it was better to start downloading and installing one update at a time, often waiting for the tablet to reboot in between updates, than to watch the endlessly cycling progress bar, not knowing if anything was actually happening.  I gradually started doing five updates at a time and ended up with the last ten at once.  All told, the process took under 8 hours.

Next, I installed the Asus driver pack and then installed Windows 8.1.

I let Windows update itself the following morning and finally installed the official Wacom enhanced tablet pc driver sometime that afternoon.

Calibration was interesting to say the least. Unlike the AVTN8, the TF810C has definite problem zones that can't be adequately addressed by the 25-point calibration. The upper left corner in particular was almost impossible to reach. I had to tap repeatedly all the way out to the second ring of the bullseye before a tap was registered. There were several other problem spots around the edges.

Fortunately, the end result is adequate and not too much of an issue for me as I don't work in the absolute corners. The cursor is accurate enough that it isn't a problem to trigger menu items in the upper left or unhide the taskbar at the bottom of the screen.

A Facebook follower reported that she has been unable to run the advanced edge calibration on her 810C because no matter what she does it will not respond to any taps in that upper left corner.

Sketching in Clip Studio Paint. Not pushing the hardware too hard, the drawing experience feels comparable to any other Wacom tablet pc.

Sketching in Clip Studio Paint. Not pushing the hardware too hard, the drawing experience feels comparable to any other Wacom tablet pc.

So far I've tested the tablet with Clip Studio Paint, ArtRage 4, Sketchtime, Sketchable, and Bamboo Paper. In all cases, I've been pleasantly surprised by the drawing and writing experience. I won't bother installing Photoshop or others because I already know that they will run but easily bog down.

With its low RAM, working at high resolutions or with many layers will quickly slow down the device. The slow processor, low memory or slow SSD all make installations seem much longer than usual.

But at the end of the day, the TF810C offers a very acceptable sketching experience. Those of you who are especially cash starved may want to consider adding one to your arsenal or gifting one to a kid.

Be aware that the dockable keyboard is no longer available, so you'll need to find a suitable bluetooth alternative or use it 100% of the time in tablet mode, which is never easy with Windows tablets, given the quirky behavior of the on-screen keyboard.

If you have patience and don't expect to work in 600dpi with a huge number of layers, the TF810C might be a bargain after all.


ADVERTISEMENT

Posted
AuthorRick Rodriguez
4 CommentsPost a comment

Version 7.2.0-10 adds 25-point calibration and right-click to radial menu

UPDATE 5: I've pulled the link to the Asus VivoTab Note 8 driver because it appears to be harming some systems. Per Wacom, users of Dell Latitude 10 and the Asus VivoTab TF810C tablets should not apply this driver as it includes a firmware update that will ruin the pen sensor on those tablets. 

UPDATE 4: The official Wacom Enhanced Tablet Driver (Feel IT) 7.2.0-10 is finally available for download here: http://us.wacom.com/en/feeldriver/

As many of you have reported, the Asus Vivotab version (7.2.0-9) is compatible with the Surface Pro and other tablet pcs. The version on the Wacom site includes some bug fixes, so you should probably stick to it unless you absolutely need finer calibration control.

Happy downloading and please share your radial menu configurations as you create them!

UPDATE 3: Omitted. Sorry folks, misread the version number.

UPDATE 1 7/21/14 : Asus has published the version I've tested (7.2.0-9) on the Asus Vivotab Note 8 [OMITTED, See Update 5 above]

UPDATE 2: I ran the new driver on the AVTN 8 and it is substantially different. Instead of 25-points, it has 81! Be patient running the tool, but it should make a huge difference in performance.

The Wacom Asus Vivotab Note 8 advanced edge calibration tool has 81 points: 9 rows with 9 targets. In this image, one row is obscured by the finished button.

The Wacom Asus Vivotab Note 8 advanced edge calibration tool has 81 points: 9 rows with 9 targets. In this image, one row is obscured by the finished button.


ORIGINAL POST

Regular visitors to the site will probably be wondering where I've been hiding for the last couple of weeks. Believe it or not, and despite my best efforts, SurfaceProArtist.com barely earns enough income to pay back its hosting costs, so as much as I'd love to do this full time, I've got to earn a living.

I'm starting up a new digital tv venture that takes me back to my roots as a network programmer so I won't be able to post here as frequently as I have over the past year. But I promise I'll be here as often as possible to bring you the latest developments in Windows tablet tech.

If any of you are interested in helping to pick up the slack, just drop me a line via the website contact form.

When Microsoft unexpectedly chose N-Trig over Wacom for the Surface Pro 3, many worried that the venerable digitizer tech giant would forego further development of its tantalizing but imperfect Enhanced Tablet PC drivers (also known Feel IT or Feel drivers).

I regularly check in with my contacts at Wacom and last week I was granted access to a preview build of a new driver version that should be available this week.

I've installed this new driver on both the Surface Pro 1 and 2, the Asus Vivotab Note 8 and the Lenovo Thinkpad Yoga and in every instance, the new edge calibration tool has resulted in much improved edge accuracy.

Using the 25-point calibration tool requires some patience and you will have to aim carefully to reach the tiny bullseye targets along the edges while holding your pen in a natural position. Fortunately, it's a simple matter to cancel and start over.

While I'm not a stickler for drawing all the way to the edge (that's what panning the canvas is for), edge accuracy is often an issue when trying to access menu bars, a hidden taskbar or the various Windows 8 Charms bars. On both my Surface Pro 2 and Thinkpad Yoga, I often had to choose between being accurate for most of the screen and being able to unhide the taskbar with my pen. For some reason, with previous calibration setups, I would always end up with just enough offset on the bottom of the screen that the pen would refuse to trigger the taskbar.

With the new edge calibration included with this driver, I am able to access both the hidden taskbar and the top-most menu items with my pen.

The radial menu was probably the most welcomed addition to the previous driver incarnation. But many of you fretted about having to sacrifice your single pen button which many use to reproduce right mouse button clicks.

The new driver solves this by allowing you to assign right clicks to the center of the radial menu. I tried to capture an image of this in action, but I couldn't trigger a frame grab with the radial menu active. And using my iPhone camera, the right click icon was overexposed.

Take my word for it: that white blog in the center of the radial menu is the new right mouse button icon that is visible if you press and hold the pen's button.

Take my word for it: that white blog in the center of the radial menu is the new right mouse button icon that is visible if you press and hold the pen's button.

So here's what you would have seen: when you click and release the pen button, the center of the radial menu is an x (or menu close icon). But if you click and hold your pen button (side switch), the x is replaced by a mouse icon with the right button highlighted.

This next step requires a bit of coordination: hold the switch, hover over your intended target, tap the mouse icon and then release. The radial menu will disappear and you'll see the context menu triggered by the mouse button.

I'll update this post as soon as the driver is available for download. 


The development build I tested was number 7.2.0-9. The release build 7.2.0-10 should be the same except for minor bug fixes.&nbsp;

The development build I tested was number 7.2.0-9. The release build 7.2.0-10 should be the same except for minor bug fixes. 

As with previous versions, the Feel driver identifies itself as Wacom Pen and is launched from the Windows Control Panel.

As with previous versions, the Feel driver identifies itself as Wacom Pen and is launched from the Windows Control Panel.

To customize the radial menu, click the Radial Menu tab. Notice the new "Use center for right-click"checkbox. This is very useful for one-button pens. The setting requires a little coordination to use, but is easy enough once you get the hang of it.…

To customize the radial menu, click the Radial Menu tab. Notice the new "Use center for right-click"checkbox. This is very useful for one-button pens. The setting requires a little coordination to use, but is easy enough once you get the hang of it. Keep the pen's side switch held and when the radial menu comes up, click on the center and then release the side switch. 

Selecting Calibrate from the pen control panel tab brings up the first new calibration screen with four calibration points. The cross hair has been replaced by a bulls eye. The screen also has useful information on how to hold the pen while calibrat…

Selecting Calibrate from the pen control panel tab brings up the first new calibration screen with four calibration points. The cross hair has been replaced by a bulls eye. The screen also has useful information on how to hold the pen while calibrating.

Upon completion of the standard calibration, you can exit or run the new Additional Edge Calibration.

Upon completion of the standard calibration, you can exit or run the new Additional Edge Calibration.

This is where the magic happens. On this screen you have 25 calibration points. As you can see by the target in the top left corner, you really need to aim precisely to get your pen into these tight spaces. So be patient, give yourself lots of time …

This is where the magic happens. On this screen you have 25 calibration points. As you can see by the target in the top left corner, you really need to aim precisely to get your pen into these tight spaces. So be patient, give yourself lots of time to perform the process and remember you can always cancel and start over. The result is a far more accurate experience throughout the screen.


ADVERTISEMENT

Posted
AuthorRick Rodriguez
Categoriesnews, Tips
50 CommentsPost a comment